Setting up filters is necessary for integrations from which not all leads need to interact with the CRM system. In all other cases, filters are not configured.
Examples of using filtering in integrations:
- If it is unnecessary to create a deal or contact in a connected CRM system, but only to update some fields of the already created deal / contact with new data (for example, with the source of traffic). Filtering is used when transferring call tracking data from VoIP services which creates contacts and deals in CRM itself, and LeadBox should only update created contacts and deals with traffic data and do not duplicate them.
-
If it is necessary to transfer customer data from one form to another, depending on what they filled out. For example: if the phone number has a European country code, then the deal should be created in the pipeline for foreign customers and distributed among English-speaking managers. And if the answer contains a Ukrainian telephone code, then the deal is created in the first pipeline and assigned to Ukrainian-speaking managers.
- If you have a lot of spam coming from a certain Webform and you don't need them in CRM at all. You can make a filter that will check the presence of contact data in new lead from this source.
How is the filter configured?!
The block of filters can be found in the settings of each integration of the source of leads. Regardless of the integration, it has the same structure and functionality

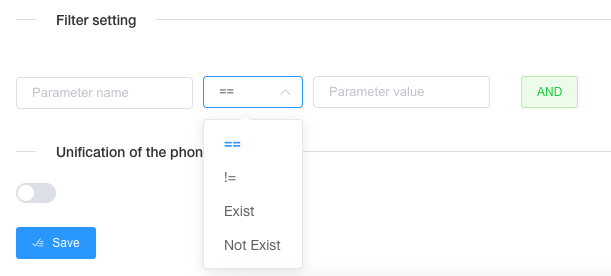
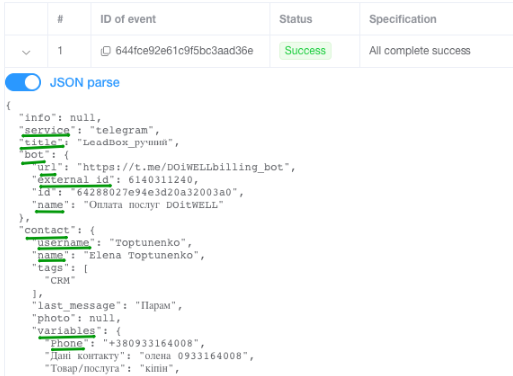
- Parameter name - here we enter the data received from the lead. We take this data from the JSON array in the Register tab. We enter them without adding {{}} - just the value:

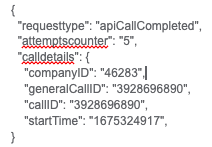
IMPORTANTLY! If you have a parameter that is nested (starts not at the beginning of a line, but as if with a paragraph), then you need to specify it with the parameter to which it belongs through a dot.Example:
In this case, companyID / generalCallID / callID / startTime are nested data in the calldetails array. To include them in the mapping of fields or in the filter, you need to write them accordingly as follows:
calldetails.companyID
calldetails.generalCallID
calldetails.callID
calldetails.startTime - Rules that can be applied to this parameter. They are deciphered as follows:
== - has an exact match (or is equal to);
!= - not equal (that is, not exactly the same);
Exist - it is filled and has a certain meaning;
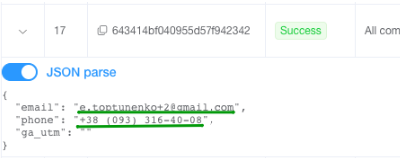
Not exist - not filled, the value is emptyWhat is selected in the filter will be sent to the CRM system. What doesn't meet the filter conditions will not be transferred to the CRM. - Parameter value - is filled in only when choosing == or != - and, accordingly, is also taken from the JSON array, but this is already what comes after the colon. Example:

-
The principle by which filter rules are added. There are two options:
- ALSO - if several conditions are written, then they must all be fulfilled for the filter to work;
- OR - at least one of the prescribed conditions must be fulfilled.

In this example, calltrackingdata is nested data in calldetails.
You can check the performance of the filter in the Register tab.
Leads that did not pass the filter will have the status Skip and Description = Skiped by filter rules: