The data collected in the Audience card in Sendpulse service can be transferred by LeadBox to the CRM system with the control of duplication of contacts and deals.
To connect Sendpulse to LeadBox and to your CRM, you need to take 3 such steps.
STEP 1: Creating Sendpulse integration in LeadBox
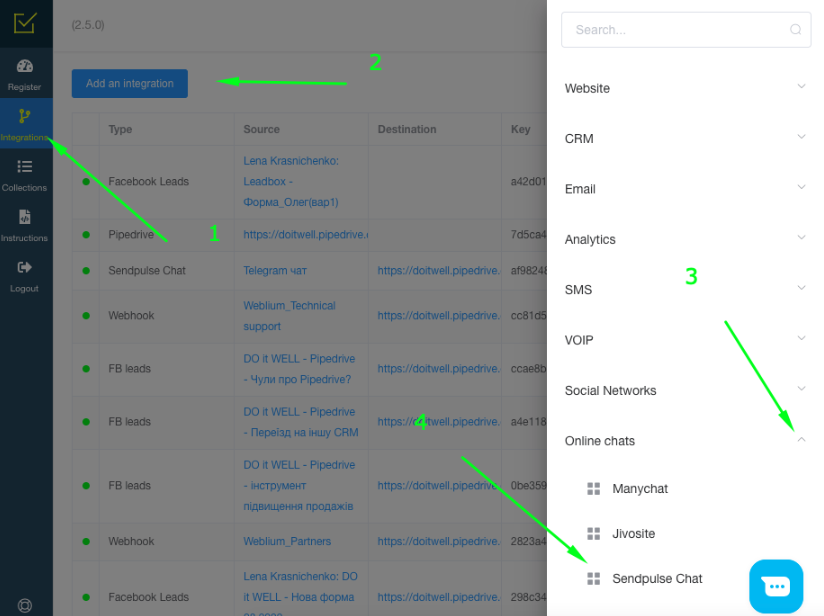
- Go to the integration section
- Click "Add integration"
- From the list of integrations that appears, select “Online chats” and press on Sendpulse Chat
- Write the name of this integration and save it.
STEP 2: Settings for sending data from Sendpulse to LeadBox
After entering the name of the integration in LeadBox, you will see a configuration page. The first item after the name is the webhook address, which you need to copy by clicking on it.
From Sendpulse, data can be sent to a Webhook:
- automatically in the bot's communication chain with the client;
- manually initiated by managers;
- automatically when a certain trigger is reached
1) The automatic option is configured in the communication chain of your chatbot with the potential customer. To do this, you should use the Action block in the chain, in which you need to select "Send webhook". In the settings of this block, you need to insert the webhook copied from LeadBox.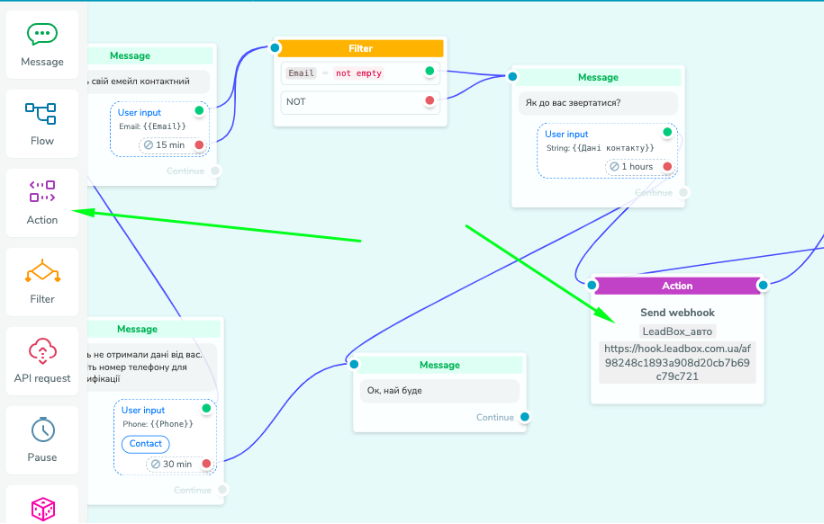
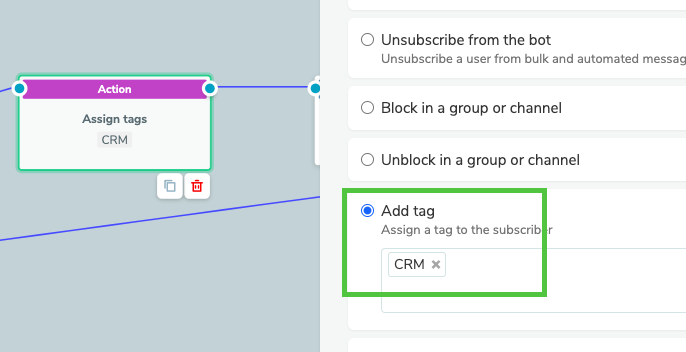
2) The manual option is activated by the manager during the communication with the client from the chat window. Manager has to start a chain in which there is the same action - "Send webhook":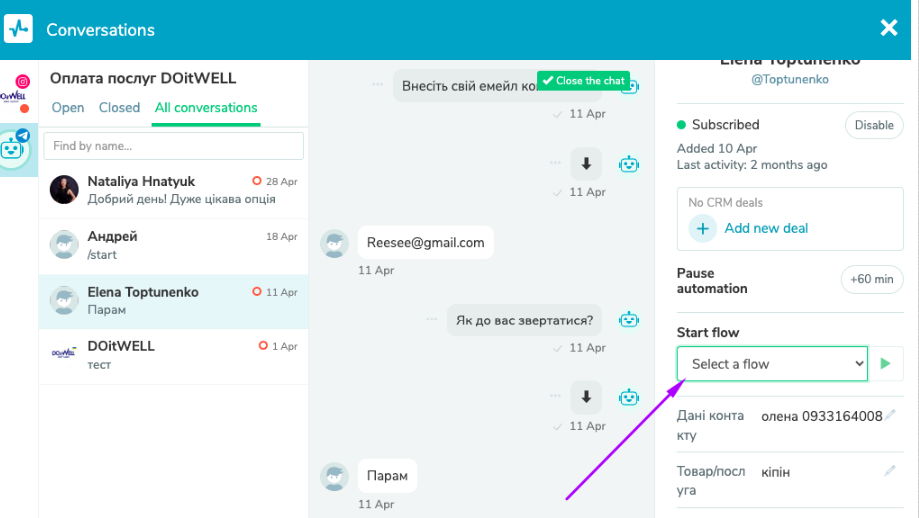
Such a chain for manual sending should be created in the bot settings in advance.
3) The automatic sending of data when a certain trigger is reached: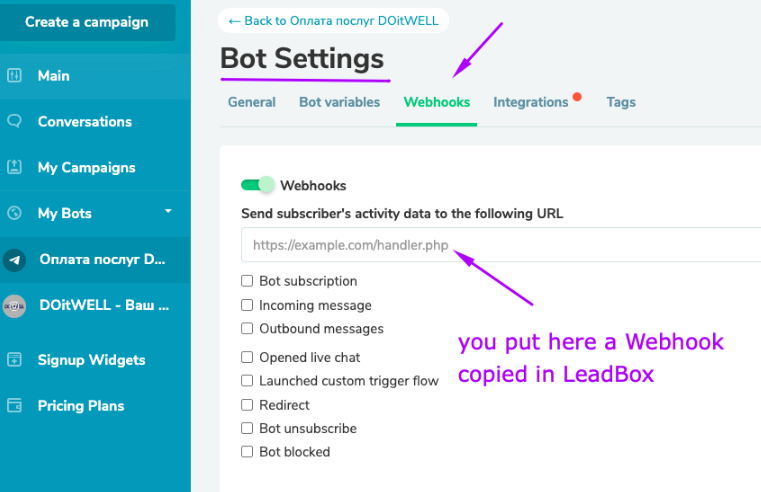 This option is better to use for updating existing agreements, since none of the triggers gives an opportunity to assess the availability of a phone / email address of the current client. And without this data, the customer is not useful in CRM.
Data transmitted from Sendpulse:
- Name (nickname) of the person in social network or messenger;
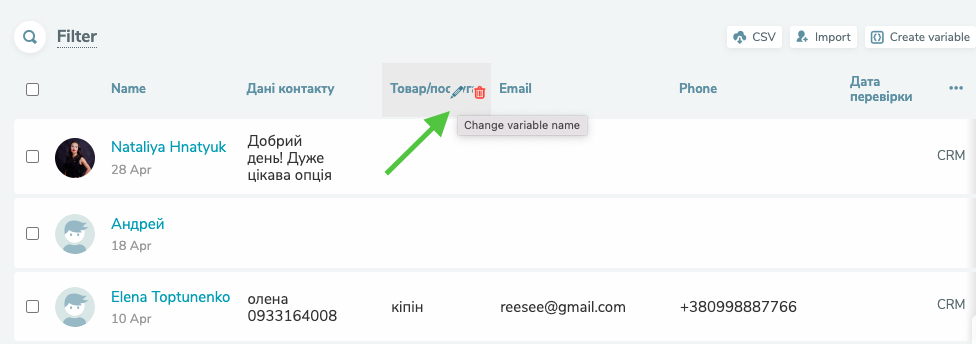
- All filled custom fields that were added in the Audience;
- The name of the chatbot itself and the messenger / social network through which the contact was collected;
- Link to chat with this client
After putting the necessary web hook in the right place, you have to send the test lead. And you will find a set of data sent from Sendpulse in the "Registry" tab in LeadBox.
Look through this data in JSON: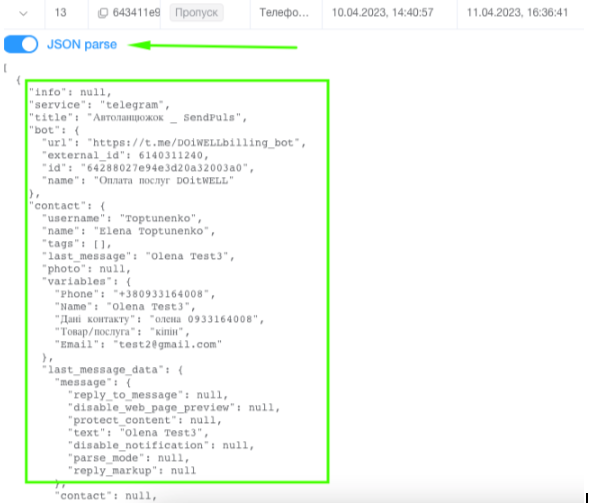
STEP 3: Settings for sending data to the CRM system on the LeadBox side
Go to the created Sendpulse integration in LeadBox and go through the configuration blocks.
- 1) Connection to - choose the CRM to which the data from SendPulse should be sent. The CRM has to be previously connected to LeadBox.
- 2) List of responsible managers. Settings for distribution of orders from this source among different managers. To configure, select a pre-created collection of managers.
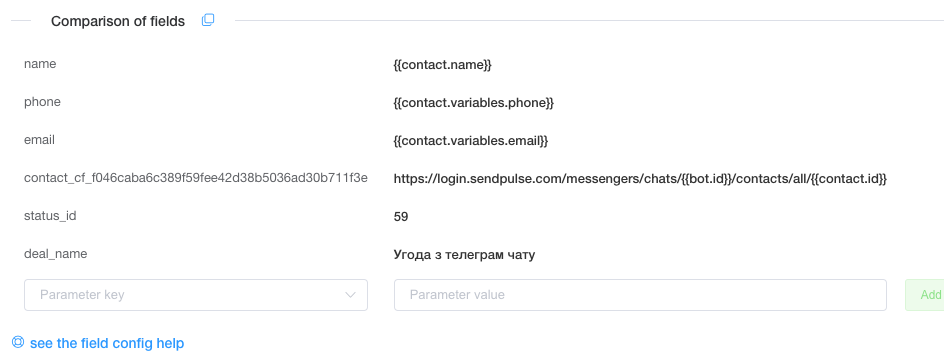
- 3) Comparison of fields
In the field mapping block, the column on the left "Parameter key" is responsible for selecting the fields that will be filled in CRM. And the column on the right "Parameter Value" is responsible for the selection of data received from Sendpulse
{{contact.variables.name}} - for the name
{{contact.variables.phone}} - for the phone number
{{contact.variables.email}} - for the email address
If for the name we use a nickname from the client's messenger, then the data on the right will look like this: {{contact.username}}
To add a link of the chat to the contact, you need to create the separated fields for each chat or messenger in the CRM in the card of the contact.
When fields are added to a contact, you match field values in CRM according to matching rules (read more here). Moreover, the value in the right column, which is responsible for the data from Sendpulse, will always be the same: https://login.sendpulse.com/messengers/chats/{{bot.id}}/contacts/all/{{contact.id}}
You can also add the name of the Agreement and the stage of the funnel in which to create a new agreement in the matched fields.
- 4) Filter setting is necessary if you do not need all the leads from this connection.
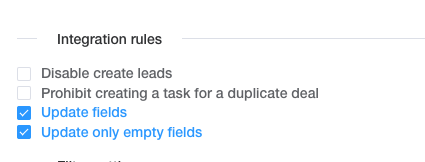
- 5) Integration rules.
In the standard setting, LeadBox verifies the existence of a contact in the CRM by phone number and email address. It also verifies the existence of an active deal of the contact. If there is such an active deal in CRM, LeadBox puts the task on the responsible user in the existent deal.
If there is a contact, but there is no active deal - LeadBox creates a deal and connects it to the contact and to the responsible user from the contact.
If there is neither a contact nor a deal - LeadBox creates both for the responsible user selected in the list of responsible users.
If this format is suitable, then this section should not be changed, but if a different algorithm is needed, you can check the appropriate points.
- Disable creating deals - LeadBox will not create a deal even if there is no contact or deal in CRM. Only update data in existing deals / contact will be made.
- Prohibit creating a task for duplicate deals - if this item is active, LeadBox will not create a task for the person responsible for the repeat agreement.
- Update all fields / Update only empty fields - LeadBox will overwrite the fields transferred from the lead form in the contact and the existing active agreement / or update only those fields that were empty (for example, Source or email).
- 6) Unification of the phone
In the standardization of the number, the format of the Ukrainian number is a priori selected, but it is possible to insert another code and change the verification of the number of characters in the phone for leads from another country.
Standardization is configured for only one format. So if you have different countries, it is better to make different lead forms for them and set the necessary number settings in each one separately.